JOURNAL
documenting
&
discovering joyful things
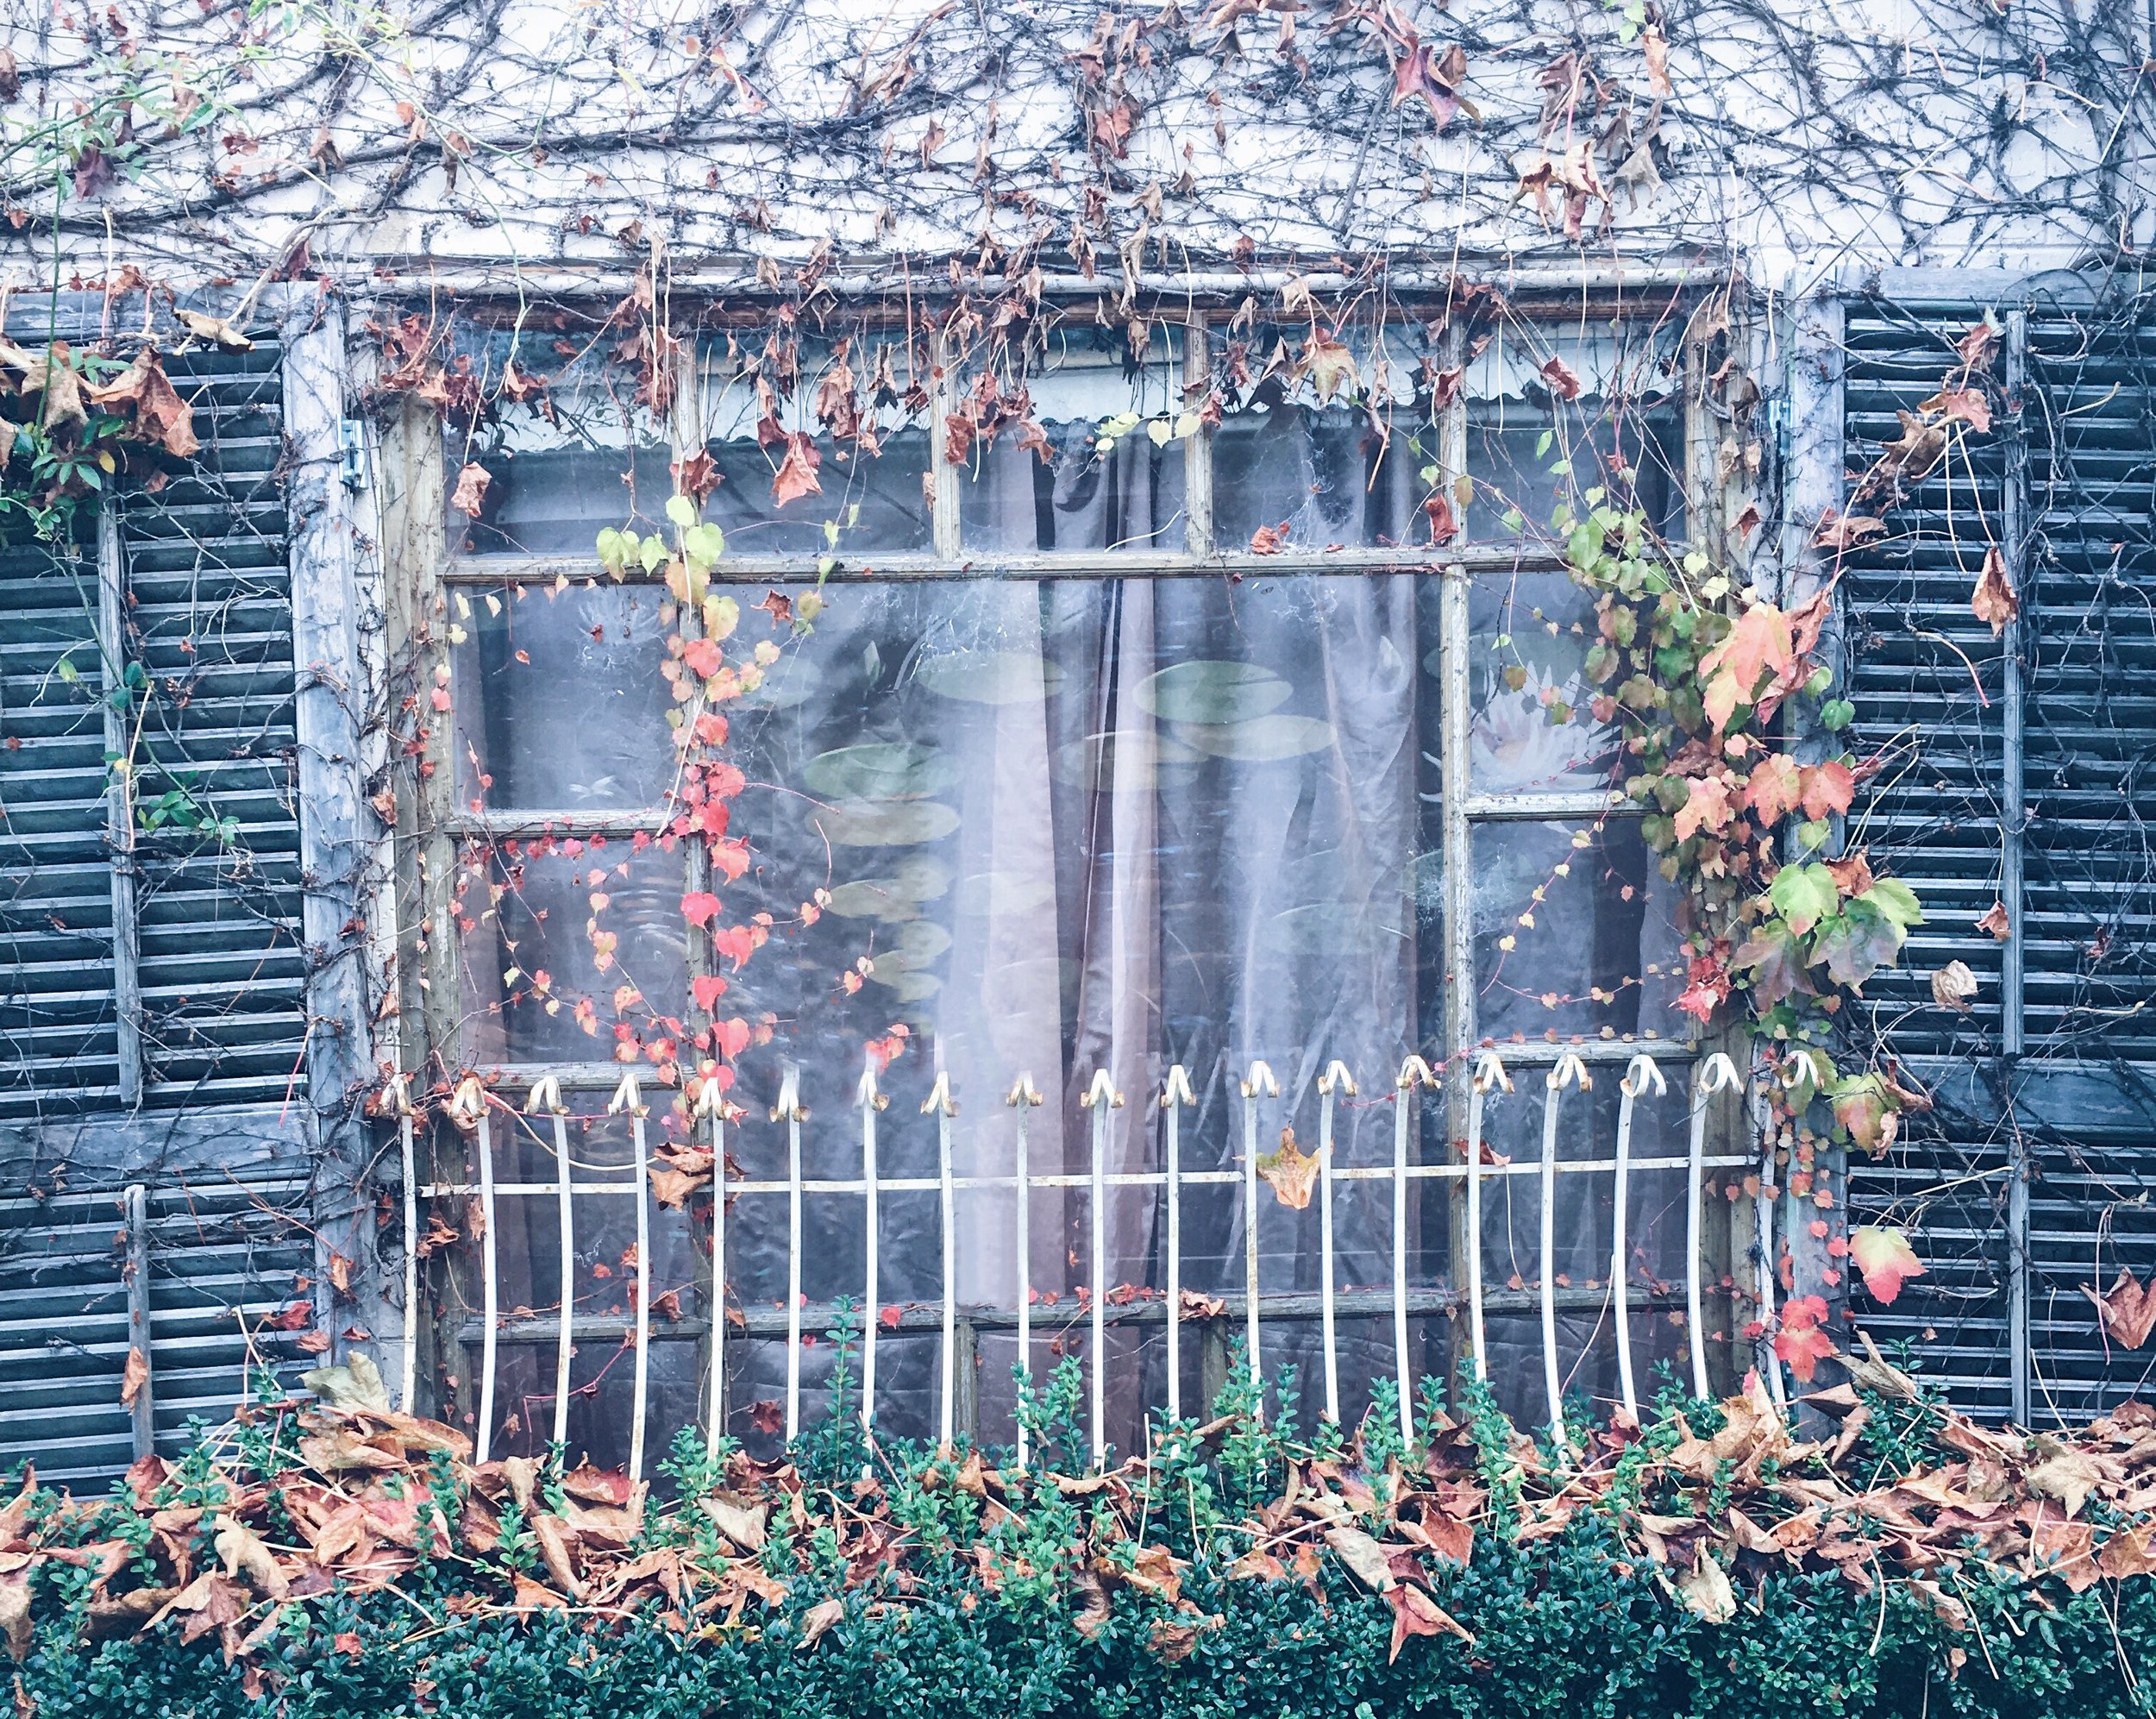
Apples, autumn, and broken hearts

It was a poignant moment. We were out for our daily exercise, the children rolling their scooters through piles of leaves and whorling autumn winds, turning the footpath into a miniature circus maximus (a circus minimus?) for their two-wheeled chariots.
There was a letter for Scout in the post and seeing it reminded me that she had a birthday coming up. (Eight! How did that happen?) And that for once, I’d have to plan ahead, this time relying on the already slow post for any birthday shopping.
I stopped her mid-chariot race and asked her to think about what she might like for her birthday this year (“no promises, but you can always let me know”). “OK!” she agreed, then scooted off again with her brother, no doubt happily dreaming up a wish-list of plastic monstrosities and impractical clothes. I braced myself.
Several more blocks of walking and scooting passed, several more mountains of leaves, but surprisingly, the requests failed to come. “I just can’t think of anything,” she told me at last.
On we scooted, more races, still more leaves, until she circled back to me again. “Mum, I don’t know what I want for my birthday because the only thing I actually want, I can’t have.
“I just want my friends.”
And that right there is how hearts break.

But in happier news…
Lingering autumn sunshine at the start of this week enticed us back out into the garden, where I cut, trimmed and coaxed all that was end-of-summer and overblown back into order, ready for the winter sleep. I lifted out the dahlia tubers, cut back the salvia, pulled out the over-zealous wild violets, gently pruned the standard roses and ruthlessly pruned the climbing roses. Out came the elderberry suckers, finished sunflowers and dried-up cosmos. In went the sprouted celery-bottom, a winter tarragon, and a neat row of garlic cloves.
All of the above was completed in stages, in between me being escorted away in gentle but no-uncertain terms by the bees, all of whom appeared to be knee deep in a case of autumn-mania. They’d permit me to dig and cut for only so long, before one would start circling my face, buzzing and nudging until I hot-footed it back to the house. There I’d hesitate in the shade of the balcony, calling out futilely, “You’ll thank me in the spring!” before venturing, inch by inch, back to the garden bed. Ten minutes later, we’d start the whole parade all over again.
When the bees permitted, I discovered the first spikes of daffodils, bluebells or snowflakes - I’m not sure which, it could be any combination of the three - peeping up from among the fallen leaves, harbingers of future colour.
A day or two earlier, on the weekend, Scout and I had walked to CERES in what was frankly freezing rain. It was such a pleasant walk together despite the weather, holding hands and chatting about everything and nothing. Once there we picked up a new pair of gardening gloves for her (which she wore home to ward off the cold wind), and a dibber for me, which was the point of the excursion. And here is a great mystery: why is it that as I hurtle towards my fifth decade on this planet, I have only just now purchased a dibber for planting bulbs?
Every year, putting those bulbs down has been an arduous, time-consuming task, trying to dig holes with a spade, deep and narrow, while not disturbing the roots of any surrounding plants. But yesterday, I put down 20 white bluebells, 10 snowflakes, 5 spare tulips, 10 allium drumsticks, and 10 nerines (all unplanned, Edna Walling style, by gently tossing small handfuls in the air and planting them wherever they landed). It probably took me less than half an hour to plant the lot, with zero disruption of the roses or any other pernickety plants nearby. Thank you dibber, my new best friend.

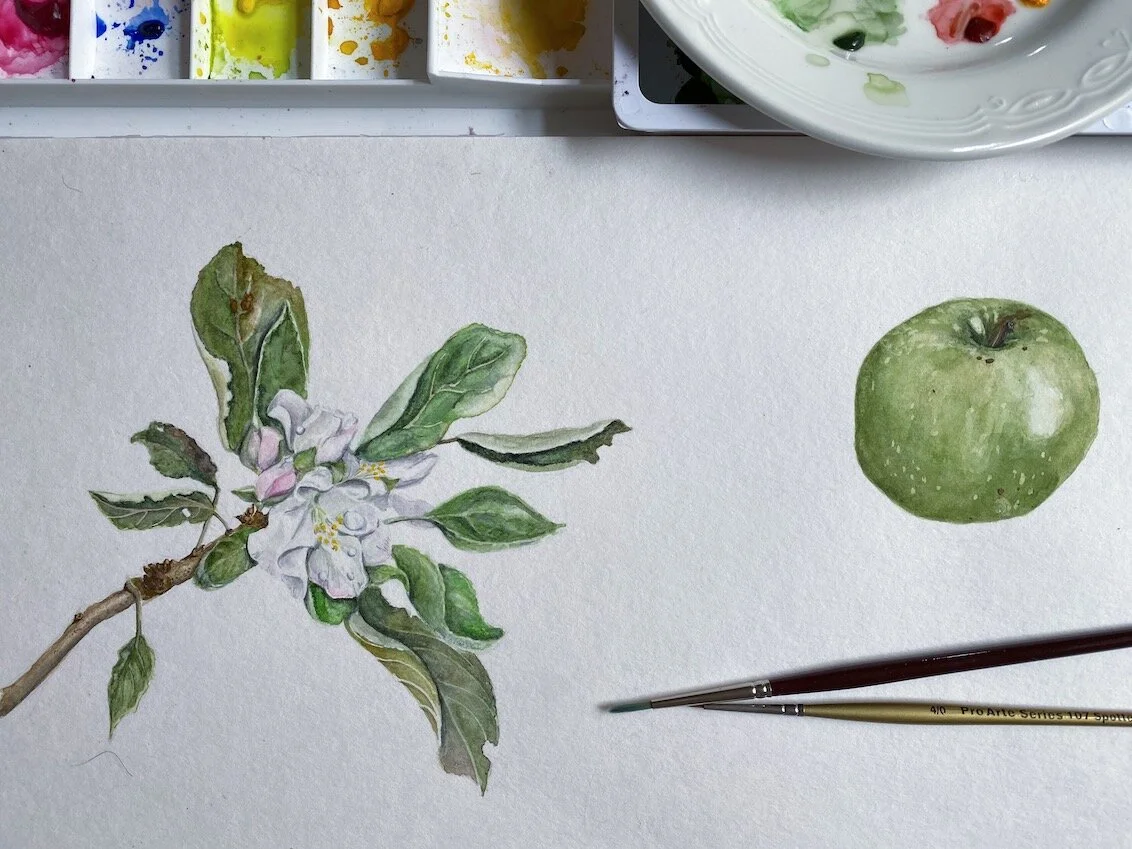
I’ve been researching a big list of seasonal produce, and painting them as I go. The biggest insights so far have been just how little I know.
Take apples, for example. Apples are autumn fruit and we probably all know that. Even I knew that, so I didn’t think there would be lessons to learn about eating apples in season. But I was wrong! Because here in Australia, apples are available all year ‘round, in both the supermarkets and all the fruit and vegetable shops. Even at the fruit and veg markets. And I’ve never really thought about where they are coming from but, if you’d asked me, I’d probably have hazarded a guess that Australia has a (relatively) moderate client, and it’s big, so the apple season lasts longer and spreads across several months in several States.
As it turns out, no.
The apple season lasts a couple of months at most. And here’s something I should have known but didn’t: once the apples are picked, the ‘bloom’ (the natural wax on them) is blasted off, to be replaced by a new wax made up of either shellac - secretions made by lac beetles - or carnauba, which comes from Brazilian palm trees. Then the apples are put into cold storage for up to a year. That apple you buy in December has probably been sitting in the ‘fridge since April, and may or may not be coated in beetle secretions.
Anyhoo, we all get to choose how we shop and what we eat, and I’m not immune to the fact that there is an enormous amount of privilege in me making that statement. But my point is, no judgement! Eat the December apples, don’t eat the December apples. Wax on, wax off, Daniel-san. But isn’t it nice to make choices that are informed? In the future I’ll be keeping one eye on my research, and the other on the calendar to find out when the farmers’ markets reopen, redoubling my efforts to shop direct from the growers.
And in the meantime, the winds have picked up. The autumn leaves are falling. Let’s play!


The time spent navigating memories


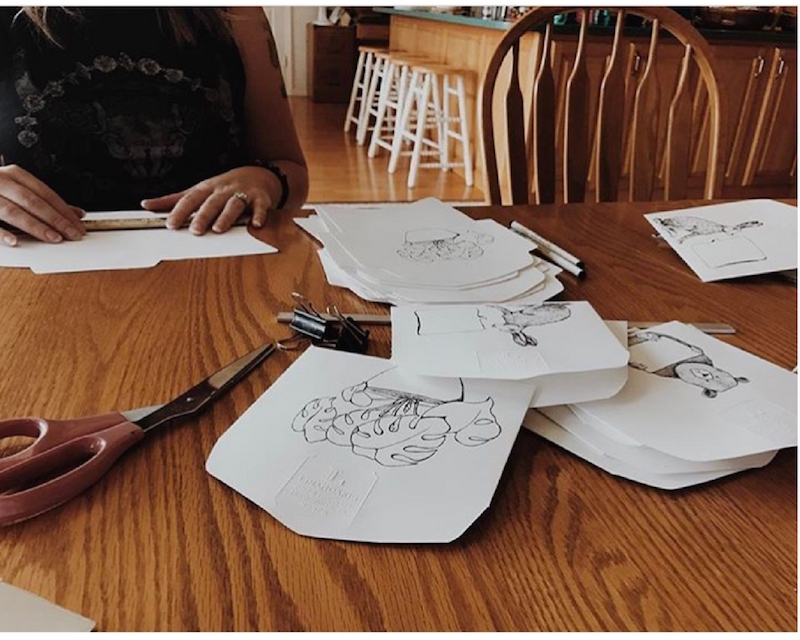
It’s a slow process. I don’t just mean the making of the #100DaysInDinan project: combing through old photographs for inspiration, sketching a rough idea onto my antique postcards, going over it in pen, painting it. Then finding old pages from magazines, tracing onto them around the envelopes that had held the postcards for a century, folding them into place, then copying addresses onto paper and pasting them onto the front of the envelopes…
All this takes time, and perhaps in retrospect one a day was too ambitious.
But the real time is spent navigating memories. As I paint I walk my memories like I walked those old, cobblestoned streets, a hundred times over, during the 100 days we lived in Dinan.
As I sketch the outline of a fresh baguette, I am back there again, standing outside Boulangerie Banette with my children, tearing the still-warm loaf into into smaller pieces to share, and the smell is the best in the world: nutty, malty, a hug.
Scout announces, “I can’t go a single day in the world without this bread,” and from that day on, our baker Mohommed keeps one or two baguettes aside for us - and often throws in some free croissants and Nutella crepes - in case they sell out before we get there (which they often do).
Now as I paint I am climbing the steep hill to the castle ruins in the village next door and I can feel the muscles in my legs burning all over again. (And oh! That wicker picnic basket is heavy! Why did I think a picnic blanket was necessary? And did we really need that much water?).
My memories tumble onwards, gaining momentum like my children rolling down a steep and grassy hill on a sunny day, squealing with laughter. I think about the friendly grey cat at the ruins that had so enchanted Ralph. He sat among the wildflowers inside the crumbling castle walls and patted the wild cat while it purred like a tractor, and I dug into the bottom of that heavy wicker picnic basket for the hand sanitiser I was sure I’d packed somewhere. We learned that French cats don’t much mind if your French is somewhat lacking.
I paint my feet in canvas shoes, dangling over the canal on a quiet jetty. As I do it, I taste again the honey and walnut cake I’d baked the day before, and carried with us on our walk. I remember throwing crumbs for ducks that wouldn’t come, and watching the tiny bubbles and rings in the water made by unseen fish coming up to feed.
On comes the summer’s day we spent in nearby Saint Malo, digging and splashing in the beach all day and then running the whole three kilometres back to the bus stop just in time for the last bus home… only to discover the timetable had changed the day before, and we were trapped. So we trudged the three kilometres back into town and found a little hotel. We ate bananas dunked in yoghurt for dinner and it was hot, so hot, so we all slept in our underwear on a big bed. I left the window open all night and watched the moon rise slowly over slate rooftops and terra cotta chimney pots as my children slept.
It slows me. I start with an anecdote but all too soon I am lost in a fully-fledged memory, and follow that path deeper and deeper into the wilds of nostalgia.
It washes over me, a longing to be back inside those slower days once more. I was mindful then, truly mindful, consciously taking in everything: watching it, feeling it, tasting it, and appreciating it. Committing it to memory as best I could, not wanting to miss a thing, not wanting to lose any of it.
So when I paint and I am slow, I don’t mind. A hundred memories is taking me more than a hundred days to record, but this project has become exactly what it set out to be: a process in gratitude.


Tiny missives: 100 days in Dinan

It has been way too long since I hosted a postal project, but all that’s about to change.
Do you fancy receiving a tiny painting on a tiny vintage card, in the mail? I’m making 100 a day, starting this week, and would love to send one to you, my friend. Here’s the story…
Last month while we were in Paris, my family and I took a walk beside the river to browse les bouquinistes. You’ll have seen them I’m sure: the little green-box riverside markets that flank both banks of the Seine. They sell secondhand books and paper ephemera, and have been doing something similar, I believe, since as far back as the 16th Century.
We had left our village of Dinan the day before and I was looking for vintage postcards from the region, but then I saw these: tiny packets of photographs that tourists used to buy and carry home with them, from the days when cameras were rare and printing photographs was costly. Most of the packets were, I’m guessing, printed almost a hundred years ago, or at least some time between the first and second World Wars.
And as I turned them over in my hands, sniffed that old cardboard (is there anything better than “old book” smell?), I knew I wanted to give them life.
I’ve spoken in the past about how I believe postcards and other tourism souvenirs were made to travel and to be shared. The journey is the entire point of their creation. And yet so often, a postcard can sit unsent and unseen in a shoebox for years, or even decades. In 2017 my husband bought me a box of 1000 unused vintage postcards (most of them fabulously ugly), and I posted them to strangers and friends alike, all over the world, for the whole year. We called this the Thousand Postcard Project. A little while before that, we found some books of antique postcards and I sent those out too, then made miniature envelopes out of the tissue paper that separated them, and posted haikus into the world.
So as our little family all stood together in Paris, with the winter wind in our faces and the children moaning “Come on this is boring” because we were supposed to be en route to the Christmas markets, those tiny cards were calling to me and I couldn’t resist. I asked the bouquiniste, “How much for nine packets?”

Later, I wrapped the miniature postcards in a scarf and carefully stored them inside the heavy 18th-Century writing box I’d picked up at the flea markets in Dinan (which was in turn nestled inside my suitcase, wrapped in rain-coats and stuffed all around with socks to protect it from bumps and bashes, and which I carried around for an entire month while we travelled), and promptly forgot all about them. This made for a lovely surprise when we finally returned to Australia, and I began the arduous process of unpacking after five months away.
Since then I have been pondering what to do with them next, and today I have decided! I will use them as tiny touchstones that will link me back to the time I spent in our French village: to the small and precious moments we shared, and the little lessons (and big lessons) we learned.

The challenge: 100 days in Dinan
I have exactly 100 of these vintage or antique cards, each of them depicting a place or a moment from somewhere in France. So every day for 100 days I will take out a card and draw or paint something simple on it that illustrates our time in Dinan. (If you want to follow along on Instagram, I’ll hashtag #100daysinDinan whenever I share a picture).
It could be as grand as a castle or as simple as the tomatoes we picked up at the markets but, as I paint, I will be remembering the sunny day we visited that castle, or the way those tomatoes tasted, sliced onto baguette and sprinkled with salt.
Cumulatively, I hope the painting of these 100 cards will help take me back to Dinan in my heart, and help to keep alive some of the slow and precious lessons I learned during our time there.
The community: 100 tiny missives in the post
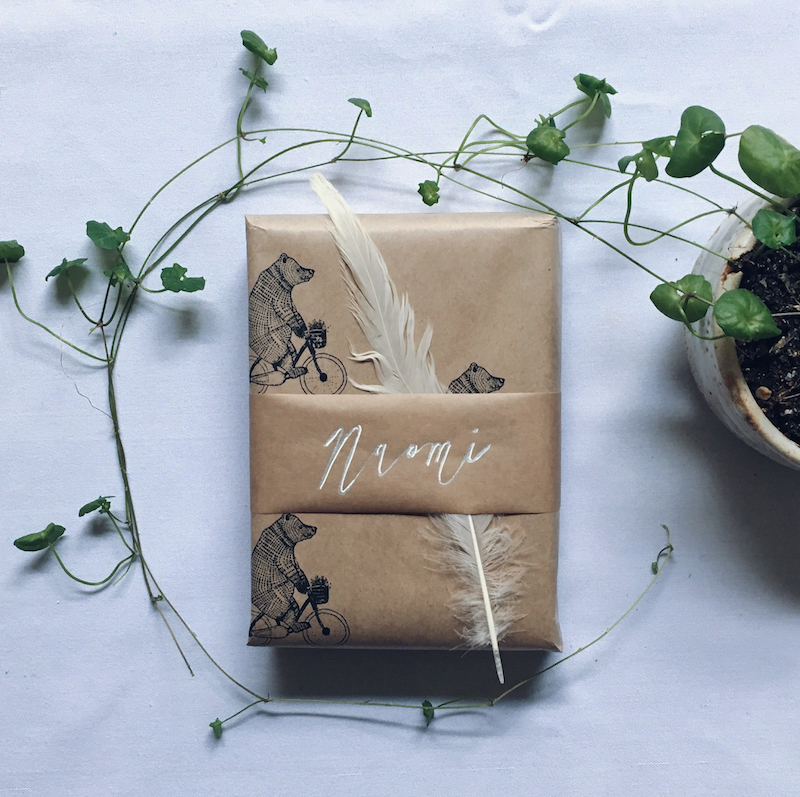
But that still isn’t setting the little cards free, is it. So the second part of this challenge is where you come in. Every day after painting a card, I will slip it into a handmade envelope and post it anywhere in the world.
Would you like one?
If you would, simply fill out the form below to share your address with me. This is all about community and for me these sorts of projects are sweeter for the sharing, so you don’t need to pay anything, join anything, sign anything or respond in any way. Just accept my thanks for being part of this little 100-day project.
The form will stay open until I have 100 addresses but, right now, I’m off to start painting!
UPDATE: I now have all 100 addresses so I’ve removed the form for this project. If you missed out, I’m sorry!
If you’d like to hear about my future projects first, you can subscribe to this blog using the box below, or subscribe to my monthly newsletter using this link. I also share what I’m doing on Instagram, and you can find me at @naomibulger.

Painting hacks (and it's ok if you're not doing it right)

Recently when I wrote my frequently asked questions post, I deliberately neglected to answer one of the questions I get asked the most often… “Can you teach me how to paint?”
The truth is that I have never felt confident enough to ‘teach’ painting, because in order to teach something it helps if you actually know what you are doing yourself! I am completely self-taught when it comes to my illustrations, and by “self taught” I mean I just keep painting, experimenting and practising… I haven’t read any books or watched any YouTube videos to improve my techniques.
(Although I’m actually hoping to remedy that this year, and take some formal lessons in botanical illustration at the Botanical Gardens in Melbourne, so maybe one day in the future I’ll have something more useful to share on here.)
But in the meantime, rather than teach you how to paint in any strict, best-practise or rules-based way, I am going to share some of the tips, tricks, hacks and techniques that I have stumbled across so far on my illustration journey.

Why it’s ok to not do it right
Because I’ve never received proper training, it is highly possible that the things I share are not the best way to do things, or that I’m simply “not doing it right.” And I think it’s important that we all seek ways to feel comfortable with this, when it comes to our own creative work.
“Not doing it right” is why I’ve held back on sharing too much in terms of how-to-paint content in the past (fear that I’m not doing it right, and fear that I’d therefore be teaching you to ALSO not do it right).
But now I’m thinking differently, and I’m going to call myself out on this defeatist attitude. Really, it’s just another form of “imposter syndrome,” the feeling most of us experience sometimes (or often) - especially when it comes to creativity - that we are not good enough, even when others appreciate our creations - and that any minute, the world will see us for the failures we secretly believe we really are.
Why do our brains do this to us?? This blog is not the place to explore the depths of human psychology (although I do talk a lot about imposter syndrome and the Inner Critic in my Create with Confidence course), but today I will stand up to my own Inner Critic and hopefully bolster you to stand up to your own, by sharing my perfectly-imperfect tips for watercolour painting.
My hope? That you will a) find some tips in here that are useful, but b) even if nothing here is useful, that you will feel empowered to experiment, play and create, without the constraints of “doing it right.” Just go for it!
Ok, shall we get started?

1. It’s ok to pencil first
You know those Instagram and YouTube videos in which people deftly put wet brushes to clean, white paper and in a matter of minutes create beautiful floral wreaths or sleepy cats on cosy couches, or potted succulents in greenhouses full of charm?
Yep, I can’t do that either.
I sketch my picture out using pencil first (2B because anything darker becomes harder to rub out later), then use waterproof black pens (my preferred brand is Sakura Pigma Micron) to draw it exactly the way I want it to look. Depending on what I’m wanting for the finished product, I add in more or less pen detail, and when that’s done, I rub out the pencil marks.
By the time I come to do the painting, it’s really not much more than colouring in.
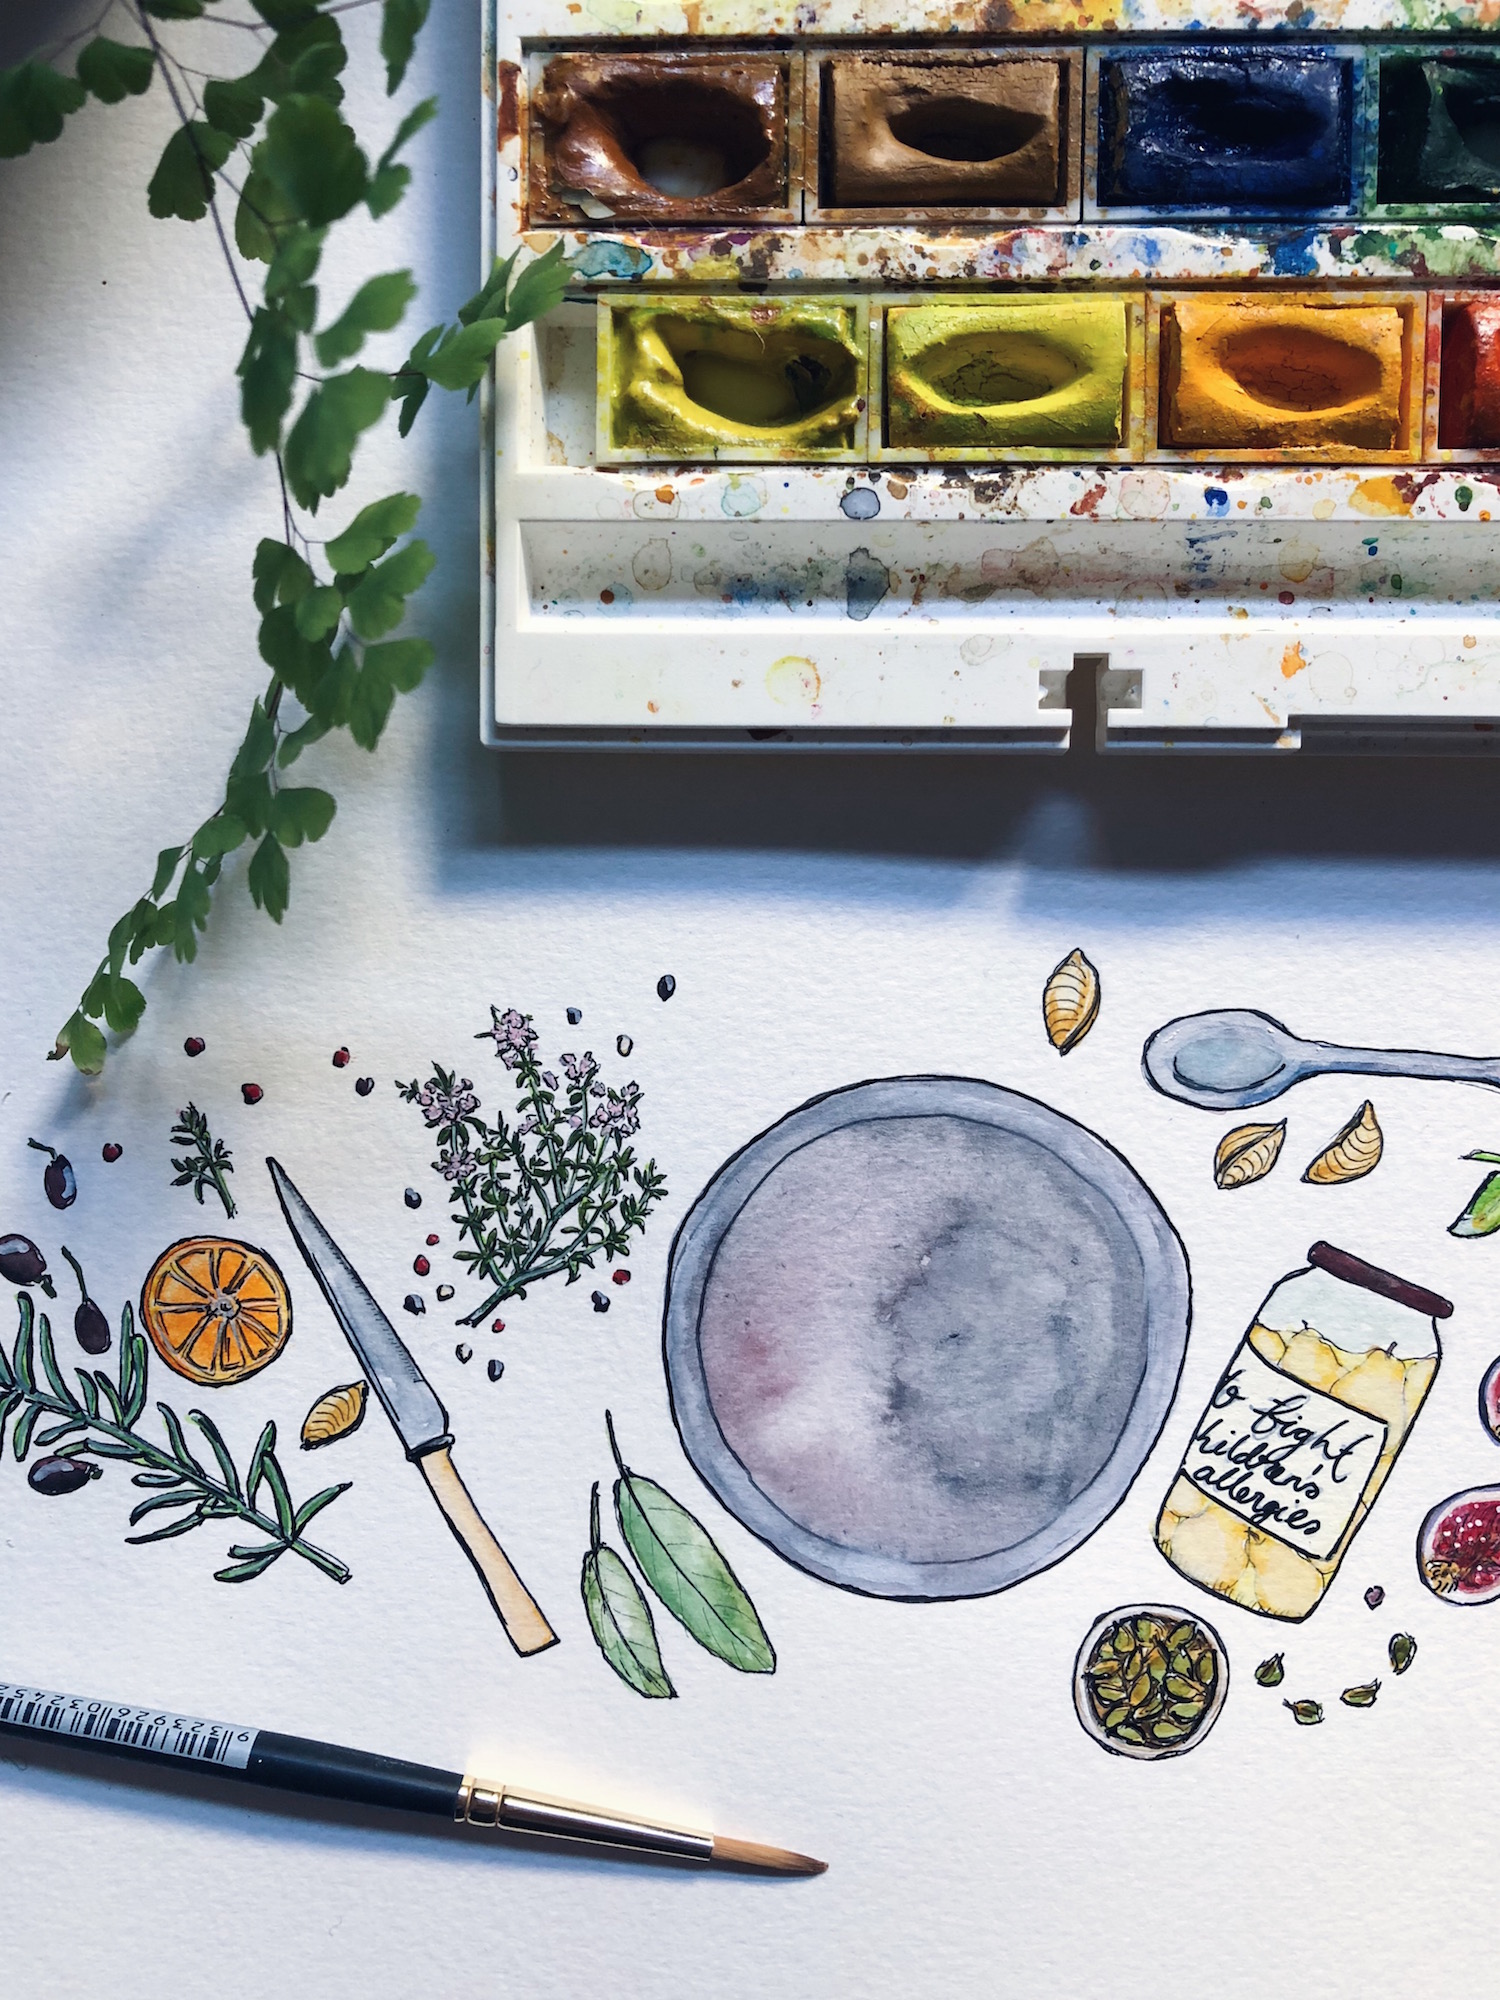
2. Painting tools (otherwise known as “You can get your paints from the supermarket”)
My father always used to tell me “It’s a poor workman who blames his tools,” and this is as true in the art-room as it is in the workshop, garden or kitchen. To whit: great tools can make life a lot easier, but they are no substitute for elbow-grease and practise.
For many years, I used sets of watercolours and gouache paints picked up in a toy-store and supermarket respectively. From time to time I still dip into my kids’ Crayola paints, and have used them for all kinds of projects, including illustrations I’ve been paid to create. Until two years ago, I was still using the used gouache paint set my grandmother gave me when I was 10 years old.
In case you’re wondering which is which:
Watercolour paints are made by mixing colour-pigment with binder. The paint is applied by wetting it and then brushing it onto paper. Once the water dries, the binder fixes the pigment to the paper. Watercolours are super-versatile because you can make the colour stronger or weaker depending on how much water you use, and you can easily blend them together or layer them over each other in-situ (i.e. on the painting itself) to create almost any colour or shade you want
Gouache paints are very similar to watercolour paints, except that an extra white pigment (like chalk) is added, to make them brighter and more opaque. (Think Toulouse-Lautrec posters and you’ll know what gouache looks like). You can also blend gouache and watercolour with one another to create just the right colour or intensity you want
Even now, my “best” paints are really hobby-grade paints (I have Winsor & Newton watercolours in a set and Reeves gouache in tubes). I’m sure an upgrade would be a good thing, but I haven’t made the plunge so far and, if you’re starting out and don’t have the means or desire to invest just yet, don’t let that stop you: some decent brushes (my favourites are 'Expression' brushes by Daller-Rowney) and a good feel for colour-blending are all you need to create lovely paintings.
Which leads me to…
3. Colour-blending 101
Alright, most of us know that there are only three primary colours (colours you can’t mix from others): red, yellow and blue. With the help of black and white, you can realistically create all the colours, shades and tones you need with just these basics.
Luckily for us, most paint sets come with a lot more options, so when we are ‘blending’, it’s to create subtlety and more realism. This is how I blend my colours:
First, I get a non-porous palette on which to mix my colours. I have an old plastic paint palette that used to belong to my grandmother, but anything non-porous will do. I also use dinner-plates, the plastic lids of my paints, anything I have handy at the time
Onto that palette, I add a small amount of the first colour, either by adding a lot of water (via my brush) to a hard colour in a paint set, or by squeezing a tiny bit of that colour from a tube
Next, I add my second colour to the palette - nearby but not touching the first - in the same way. And so on for any subsequent colours. So for example if I was making purple, I’d do this with blue and red.
Now I’ll bring a tiny bit of one colour into the middle, and a tiny bit of the other colour into the middle, and mix them together. Based on what that looks like, I’ll add little bits more of one or the other colour, until it looks right. At this point if necessary, I might bring in some other tones, for example a bit of yellow to give it warmth, or white to brighten it up, or a tiny bit of black to tone it down.
The trick is to do all of this gradually, one small bit of colour at a time, so that you can rectify any mistakes or any time you’ve overdone it with one colour, and build up slowly until you get exactly the shade you want.
If necessary, I test my blends on a scrap piece of paper, just to see how they look once they dry, and also to test how much water to add, to create the look I’m going for.
Once I’m happy, I use this new colour on my painting. If I find I’m running out, I start the process all over again but make sure to do it before the original blend has run out, so that I can match the shade as closely as possible so that my painting remains consistent.
4. Colour-blending combinations that come in handy
While travelling for five months I had only the smallest of travel-paint sets, so I had to do a lot more blending to get the colours I like, than I do at home. I am drawn to a muted colour palette with soft, natural tones. But my little travel paint-kit was full of bright and primary colours. Here are some of my personal thoughts on colour, and some of my favourite combinations to achieve the tones I love.
First of all, I have something to say about black. I’ve learned from experience that black can easily dominate a watercolour picture. Look around you: most of the things you think on first impressions are black are not actually true black - most likely they are a kind of dark grey, or a warm kind of black or a cool kind of black… do you see what I mean? For this reason, I almost never use actual black in my paintings (other than in the ink outlines). Instead, I either water it down heavily until it becomes a kind of grey, or I use this blend in the top row…
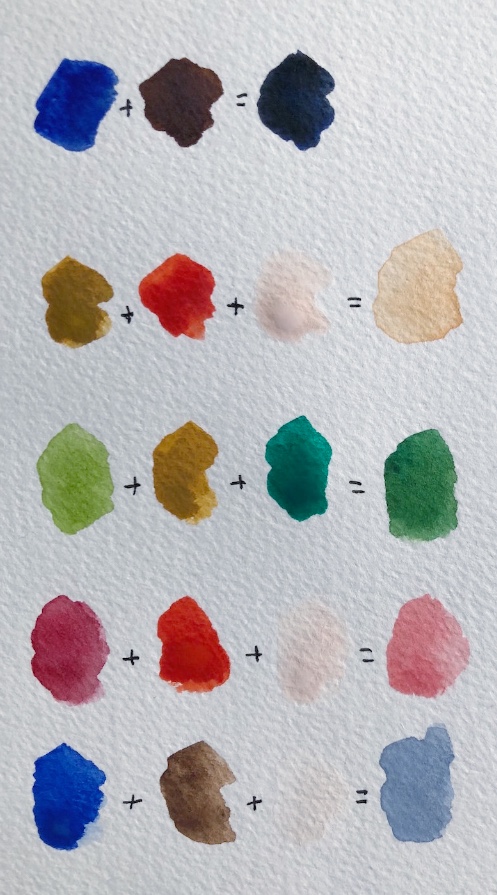
TOP ROW: The “sort-of black” here is achieved by blending dark blue and dark brown together. If I want a warmer black I add more brown, if I want it cooler I add more blue. Because it’s not “true black,” it looks more natural on the page.
SECOND ROW: I mix light-brown, orange and white together with a fair bit of water to create this kind of neutral sand, which forms the base for all kinds of other colours I need. It goes well with greens, and is also a good starting point for skin-tones, as it can go lighter, darker, or a touch pinker
THIRD ROW: I paint a lot of botanicals, but find the ready-made greens are often unnatural. Also, there are just so many shades of green in nature, just one or two won’t cut it. Depending on what I have to hand, I most often mix a lighter green with a darker green, and then play with adding either light brown, yellow, or the sand I created in the second row above, to get the right tone for the leaf I’m painting.
FOURTH ROW: I’m not a fan of “candy pink” but I love a duskier pink in everything from flowers to sunsets to balls of knitting and an old lady’s hat. I get this by blending the dark red in my paint set with a kind of fire-engine red/orange also in the set, and then adding white until I get the exact depth I want.
BOTTOM ROW: The dove blue/grey here is one of my favourite colours, and I get it by mixing royal blue (as opposed to the dark blue of the top row) with dark brown, and white. It is a much prettier and more natural sky than just watered-down blue, and by adding a tiny bit more brown I can turn it into a lovely, soft grey, that is nice for animal fur, for example, or to add shading and texture to the bark of trees.
(NOT PICTURED BUT HANDY): Purple is quite difficult to make. Most of us know to blend blue with red, but too much red and you quickly get brown instead. I try going lighter first: I’d probably blend the dusky-pink and dove-blue colours in the bottom two rows together, to create a soft kind of lilac, then I’d add more of any of the colours in those two rows bit by bit, in order to get the exact tone I wanted. For me, this is easier than starting from scratch with just red and blue.
4. How to shade a painting
One of the easiest ways to bring a painting to life is to add shading. This not only makes whatever you’re painting look more three dimensional, it also adds interest and texture to what you have created. Imagine a painting of a cactus in a terra-cotta pot. You could simply paint the pot a terra-cotta kind of orange, OR you could create shading to help it look round, rough-to-touch, and give it that lovely aged patina that real terra-cotta gets.
Here are some of my tips and hacks for shading a painting:
A consistent light-source
The most important thing is to imagine a consistent light-source. Imagine shining a spotlight on whatever it is you are painting, or imagine which way the sun is shining or where the window is. Keep that light-source consistent in your entire pattern. It will do all kinds of weird things to people’s brains if the shadows on one part of your picture are on the left, and in the other part they are on the right. Light doesn’t do that (unless you’re a surrealist painter).
It’s lighter where the light is (duh, Naomi)
If the light is coming from the right, everything on the right-hand side of your picture (from terra-cotta pots to trees to animals to a bottle of wine) will be lighter and brighter on the right, and darker on the left. If the light is shining straight in front of your thing (like your terra-cotta pot), then it will be lighter and brighter in the middle, and get darker on either side. If the light is coming from directly above, the leaves at the top of your plant will probably be lighter than those at the bottom.
Shadows are not only about light and dark
Shadows don’t have to be created by simply applying lighter and darker versions of the same colour. Here are some of the ways that I create shadows in order suggest a light-source and create interest:
a) By using more or less intensity of the same colour (by adding more water to make it less intense)
b) By putting a watery drop of dark-blue, black or dark-grey into the areas that I want to shadow, after applying the first ‘main’ colour
c) By blending up two versions of a colour, one that is darker and/or more intense for the areas that are to be in shadow (for example in the case of a terra-cotta pot, I will often blend up two versions of the neutral ‘sand’ colour I shared above, one that has slightly more light brown in it, and another with a bit more pink. The first will be my main ‘in the light’ colour, and the second will be the darker shadows)
d) By using a completely different colour for the shadows, which might be unexpected but, because it is darker or stronger than the lighter areas, still tells viewers’ brains: “this is shadow.”
e) By painting the object one colour, and then “blotting away” the part I imagine to be in the sun, by pressing a paper-towel down over that part. Pressing the paper towel down immediately will remove all the colour. Instead, I like to wait a short while (a minute or thereabouts) and then press - that will take away some of the intense colour, but leave a softer version.
What ever technique you use to create shadows, if you want to have a soft or even invisible transition between the light and shade sections, a good tip is to take a clean, wet paintbrush and gently brush water over those “transition lines.” I don’t always bother with this because sometimes I like things to look a bit more rough and deliberate, but you can create a very natural, organic transition from light to shade if you want to, just using water in this way.
Here are some examples of different ways I’ve created shadows:
In this partial painting of a castle in Dinan, I used a watery dark blue to create the shadows, despite there not actually being any “blue shadows” on the golden stone walls
In this painting of a whale I made for a Boots Paper greeting card, I used a rather unnatural aqua blue as the shading at the bottom of his belly. The brightness of the blue, and contrast to the much more washed out almost-white of his body, creates the shade I wanted, while also suggesting a watery “whale in ocean” feel that I wanted, despite not painting the ocean
In this greenhouse mail-art picture, I used three different blends on the terra cotta pots to show the light, middle and dark sections of the pots (and to add interest and texture), and blotted some of the way almost entirely, then added white paint, in the areas I wanted to appear super-light. (Here is another picture of pots in which I was - slightly - more subtle in the shading)

5. Paper, and paper towels
Paper weight
(As in, the weight of the paper, not the old-fashioned paperweight that your grandfather kept on his desk).
In general, it is best to paint with watercolours and gouache on paper that has been specially made for that purpose. Watercolour paint is thicker than ordinary paper, which helps to stop it from going bumpy and buckling with all that water. So to give you an idea:
Ordinary copy-paper is usually 80gsm (gsm just stands for “grams per square metre” and refers to the weight, or thickness, of the paper)
A fairly average watercolour paper thickness is 185gsm
Obviously, you can experiment to see what works for you. I have used copy paper plenty of times in my mail-art, and just flatten it down under books overnight if it buckles too much.
But if you pop into an art supplies store and ask to buy watercolour paper, it can be a little overwhelming. There’s weight, there’s texture, and there’s all those different methods of making the paper itself. How do you choose?
Here’s what I have experienced so far (although please remember - see the top of this longgggg blog post - that I am an amateur):
Rough, textured watercolour paper looks fantastic on those old watercolour landscape paintings you might have seen. It gives a lovely tactile feel to the painting
If you want to paint something for printing (such as something for a book or stationery, like my illustrations for Boots Paper), the texture might go against you, because it will stand out too much against the smoothness of the page elsewhere
Paper that is “hot pressed” gives you that smooth feel I’m talking about, and the other benefit is that the paint dries quite quickly on it so you can layer your colours on quickly
Paper that is “cold pressed” tends to be slightly more textured (though not necessarily as rough as the old-fashioned paper I mentioned earlier) so the paint stays wet longer if you want to create some effects using water and blends. (As an example of this, take a look at the image of food around a grey dinner plate I shared earlier: the dinner plate was left blank because a logo was going to be added inside it, but for subtle interest, I used a lot of water to create that slightly ‘bleeding’ effect you see, reminiscent of glazed pottery)
Most watercolour paper is either cream or white - think about what you mostly like to paint when you choose, and the tones you prefer. For my Boots Paper illustrations I use a slightly more creamy background, because that is what Boots’ owner, Brenner, prefers. For my own work I like a brighter white, because I prefer cooler tones
Preparing the paper
Confession: I never do this. I mean never. I have never even tried it. However… best practise is probably to stretch and then tape down watercolour paper, to ensure you have a perfectly flat surface, and that the paper doesn’t buckle with all the water you apply.
Perhaps if I painted more landscape-style images with big wash areas, I’d have felt the need to learn how to prepare my paper sooner, and have cultivated this good habit. Because my illustrations are mostly quite small, it hasn’t been an issue (so far).
If you want to learn how to prepare your paper (or want to teach me), here’s a tutorial.
Paper towels
My favourite painting tool, other than paints, brushes and water, is a trusty paper towel. My favourites are the kinds that have little patterns embossed on them. I always have one or two paper towels beside me when I paint, and I use them to:
Clean brushes (after I’ve cleaned them in water, I wipe them off on paper towels to be sure they don’t have any paint residue left on them)
Blot away mistakes (if the paint is still wet, you can blot it with a paper towel and you are magically back to blank paper! Even if the paint has partly dried, try wetting it thoroughly with a brush, then blotting)
Blot sections of an image to create a feeling of light and shade, as I mentioned above
Create texture. If there are embossed patterns on the paper towel, it can be fun to actually use this in my painting: I press the paper towel over the paint while it is not quite dry (but not super wet or the paint will disappear) to create a fun, mottled pattern
Here is a short video in which I use a paper towel to create light and shade in my picture, let the paint partially dry (while I sip tea, naturally), then create a new layer in a different colour.

I hope this blog post was useful! I feel a little bit silly and vulnerable writing about “how to” on something I really do just muddle through, and feel about as far from being an expert as you can possibly imagine.
This lack of training probably makes me a fairly poor instructor: if there was something you were wanting to know from me about how I do my painting, but I’ve failed to mention it here, feel free to ask away. Likewise, if this actually is useful to you and you’d like to know more (such as some tips on drawing, for example, which in all honesty would be equally bumbled-through), let me know and I’ll see what I can come up with.
But no matter what, I DO hope this long post inspires you to pick up that dusty old paint-set (yes, the one you picked up for your kids at the supermarket) and wile away an afternoon playing with colour.

Creativity, kindness, and the Internet

So, this is one of the most beautiful stories I have ever had the pleasure of sharing. A few weeks ago, I shared a photograph of this mail-art on my Instagram account: a painted journey (kind of a map for the postie) of the route my letter will take, from my home in Melbourne, out through the suburbs, past vineyards and the iconic Hanging Rock (remember?), all the way to Pippa's house in a country town at the edge of the Macedon Ranges.
A day later, I received a message from a beautiful German lady called Fine. She had used my mail-art as inspiration to write a short story about a different sort of journey, the slow unfolding of an old man from retirement and grief to openness and adventure. She wrote the story "just because," and sent it to me as a gift. With her permission, I have reproduced it for you here (I gave the story its title, but the rest of the words are Fine's own).
Fine's gift of this story left me slightly breathless. I am always telling people that writing a letter (as opposed to, say, an email or Facebook message) is extra special because you are giving someone the gift of your time. I feel the same way about this story, because she took the time to think about my painting, and through it brought an old man to life with her words.
The next time social media algorithms or online bullying or targeted advertisements on the Internet weigh you down, think about Fine, and this story, and how people all over the world are making the Internet work for them (not the other way around), using it to spread creativity and kindness as far as they can go.
GUS AND THE YELLOW BICYCLE
by Fine Winkel
The elderly white haired man with his old and rusty yellow bicycle (that squeaked with every step on the pedal) had long ago stopped dreaming. Had stopped caring, and had stopped doing anything wholeheartedly.
When he woke in the morning, he allowed himself to wince for just a second, glimpsing at the empty pillow next to his, where he used to see Erna’s red curls and her beautiful, warm smile first thing every morning. As the red had faded into white Erna had begun to fade away herself, somehow getting smaller and in the end with her, all the laughter, the friendly chatter, the music and the delicious smell of apple cake had disappeared. After she was gone, the house felt empty and cold, and the lines on his face were no longer from smiling but from cruel scribbles of grief.
His light-blue mailman uniform was still pressed and the remaining strains of his white hair were neatly tucked under his dark blue cap, but he avoided looking into the mirror over the bathroom sink other than to shave, because he could hear Erna’s frail voice making him give three promises on the last morning they had woken up next to each other… and he could practically see her disappointment reflected in his own eyes.
The promise to call their son every week, the promise to harvest the crunchy and juicy apples from the tree they had planted together when their son George was born (so he could make apple cake with Molly, their granddaughter, who had inherited her grannie’s red curls and twinkling green eyes), and the promise to go to the pound and adopt a deserted old dog who would trot alongside his bike on his daily delivery routes.
He had tried the first year, he really did. But he wasn’t good at putting his feelings into words, so he had stopped calling George after a few stilted conversations with increasing periods of silence. He couldn’t find Erna’s recipe book so the cake had been a disaster, and Molly seemed to be afraid of the haggard-faced old man who had instead served dry-as-dust cookies from the rear end of the kitchen cupboard, having forgotten to buy milk and ice-cream, so he had stopped inviting her. He had made his way down to the pound several times, but just couldn‘t bring himself to walk into the sterile, rectangular building that crouched at the bottom of the hill just outside the village, for fear that even the poor creatures inside would sense his grief and plainly refuse to come home with him.
So when old mailman Gus stepped into the red-brick Post Office for the last time, the day before his dreaded retirement, he didn’t expect in the least that his life would be going to be turned upside down in a heartbeat. He didn’t mind that there wasn’t any bon-voyage bunting over the door, or a cake in the break room, or even a card on his small desk to bid farewell to one of their own after 49 years of doing his duty and unfailingly delivering each and every letter to his destination. He had become solitary, and his sendoff would be a silent one.
Still, he would miss slipping into his uniform and feeling his life still had a small purpose in this world.
Gus began to re-sort the few letters addressed by hand that couldn’t be read by the machine that by now did all the sorting. To make out the flowing handwriting, Gus had to put on his glasses, which he knew would have made Erna giggle with delight at her husband’s vanity and tell him, “Honey, maybe it’s a good thing you’re as blind as a bat without your glasses and you refuse to wear them. Your eyes have a built-in Gaussian blur to hide all my imperfections.” He briskly shoved aside this sentimental thought and concentrated on the task ahead, just now noticing an envelope at the bottom of the pile.
During almost twelve hundred days of delivering mail, Gus had never seen a letter more beautiful, and was instantly reminded of the most exquisite illustrations in an old children’s book Erna had loved to read to little George and later to Molly. The kids had spent hours discovering small details and oohing and ahhing over tiny maps depicting the magical village surrounded by woods steeped in legend. It made him sad to see all this elaborate drawing on the letter, knowing it would never arrive at its destination behind the densely wooded mountains. His replacement Kevin, though much younger and stronger than Gus, wouldn’t care for the extra work and would just mark it return-to-sender or, even worse, put it into a folder and forget it ever existed.
Once again Gus could hear Erna’s voice, but this time it wasn’t frail or sad or disappointed: it was strong and energetic, and it reminded him of all the adventures that he, George and their dog Albert had planned while studying the cherished illustrated map. More than once they had packed their backpacks and taken their bikes to start on an adventure, coming home sweaty and with messy hair, but with enormous smiles on their faces, to breathlessly tell Erna everything they had seen, while eating cake fresh from the oven.
No, he wouldn’t let this envelope that had, as if by magic, replaced his wife’s sad mutter with joyous incentive, just sit in a folder gathering dust. He would – and he couldn’t quite grasp his own boldness – deliver the letter himself, and start on an adventure once more. Quickly he glanced around, making sure no one saw him slipping the envelope into his pocket.
He hadn’t felt this alive in years, as the warm fall afternoon turned into night, and he made his way home from the pound on his squeaky old bike with a new faithful companion by his side.
For now he would call George and ask him to come over for apple pie next week (the handwritten recipe book had been found lying in a box with Albert’s old bowl and collar, clever Erna). But first thing tomorrow, Gus and the chocolate Labrador, Hamilton, would embark on an adventure. And he couldn’t wait...

Horizons (+ podcasts for creatives)

Somewhere on the road in between Swansea and Binalong Bay, as the past four days of clouds scuttled out to sea and the tiny coastal towns rolled away behind us in fresh new sunshine, my own horizons began to open up, too.
Because, of course, holidays are as good for the mind as they are for the body. Bogged down in the everyday needs of meetings and deadlines and parenting and just, well, life, I couldn't see the path forward, and I had no idea what to do. I was so desperately unhappy in the work I was doing, but my financial obligations to my family meant I didn't have a whole lot of choice. Writing was the only thing I knew how to do that would earn me a 'real' income, and copywriting was the most reliable way to earn that income, but boy was it taking its toll. I was bored, tired, uninspired and unenthusiastic, and resented every second I gave to that work, which took me away from my children and from doing the creative things I loved.
But as the road unfolded in front of us and the children slept in the back seat, the salt air began cleaning away all that resentment and I began to spy, in its place, opportunity.

Creative thinking needs space to breathe, and the road and the sea breeze and the early nights were just the space my brain needed break free.
I came home and did something radical. I changed all my work priorities around to pursue my passions of art, snail-mail, and slow-living.
First, I built a new website (the one you're reading now). Then I created an e-course about snail-mail, using some of the content from the book I'd been writing for the past three years. Against all my expectations, the course sold out. Not once, but twice, and there's already a waiting list for a third intake.
While that was happening, I sat up night after night drawing designs for a unique colouring book that contained more than 60 mail-art envelope templates. I launched the colouring book as a downloadable product only, and pre-sold more than 100 in the first week I announced it.
All of this was happening late at night and early in the morning, to work around time spent with my children and on the day-job. But in October, I finally made the decision to quit copywriting. Financially this wasn't the smartest move, but boy it felt good. I spent a whole day sorting out my office and shredding secure documents from past clients, and if I'd been burning sage it could not have felt more cleansing. Ever since that day, I've sat down in my office on those three official 'work days' while the children are in childcare, and I work on the things I truly love.
The income side of it is a bit messy. I illustrate for commissions. I make e-courses. I'm a TA for another online educator. I write magazine articles. I write books. I illustrate books. All of that adds up to the very bare bones, a lot less than I was earning before, yet I'm working harder than I ever have before. But every day, when I sit down at this little office, it is with joy.
I'm so full of energy and ideas that the day flies past, and when I stop work to go and pick up the kids it almost feels like waking up from a dream. Awake, and satisfied that I've given this work my all, I'm also in a much better place to give my kids my all. My time is all theirs and, again, it is with joy.
I have so many plans I don't know what to share with you first. Honestly I don't even know why I'm writing this blog post, other than that I just feel so free and happy to be working so hard on what I loved, that I wanted to share. And I want to thank you for reading this blog, and for supporting me in so many ways.
Whether its buying my courses or products, reading my blog or newsletter, commenting to let me know you're there on Instagram, or in myriad other ways, you are the community that has kept me going. You've told me what you liked (and didn't like), what you wanted, and how you wanted it. You inspire me every day to make and give away new things, and I'm just so grateful for the support and inspiration.
Here's to new horizons. Here's to you!

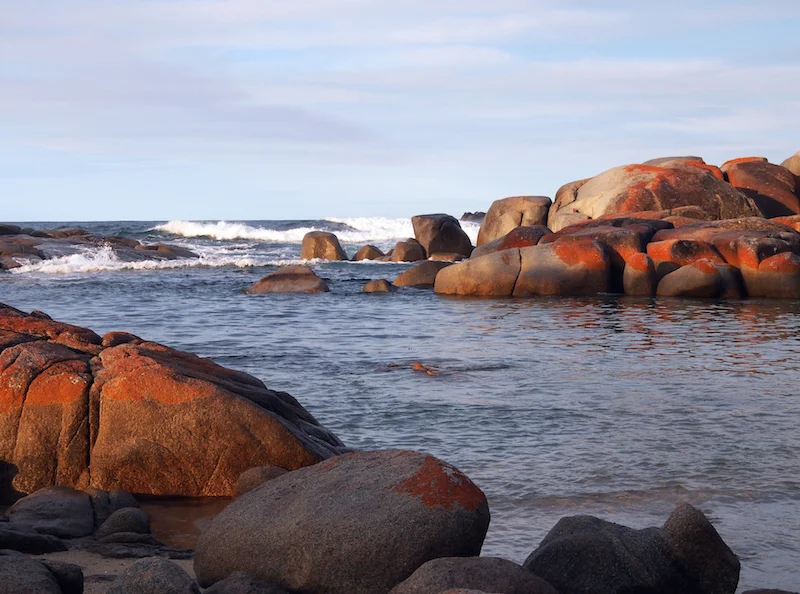
ps. At night time in Tasmania, while the children and my husband all slept, I started listening to podcasts to find inspiration and practical ideas for turning what I love into the way I make my living. I'd make a cup of tea, put in headphones so I wouldn't wake my family, curl my feet under a chair in our holiday house, and listen in. It felt like private coaching from a whole host of experts, right at the time I was dreaming about a new way forward. I've shared my favourites of those podcasts here, in case you're searching, too.
Podcasts for creative people in business
Courage & Spice: the podcast for humans with self doubt
by Sas Petherick
The blurb: "If self-doubt is holding you back in your relationships, career, creativity or your business, Courage & Spice is especially for you. You’ll find inspiring conversations about all things self-doubt – including real-life stories and research-led approaches to help you navigate through it."
Explore Your Enthusiasm
by Tara Swiger
The blurb: "Let's explore what it takes to craft a sustainable, profitable, FUN business, while staying enthusiastic and motivated. Whether you just opened your first Etsy shop, or you've been selling your art, design or writing full-time for years - you struggle with doubt, loneliness, motivation and getting it all done. In this podcast we'll explore what you REALLY want from your small business so that you can follow your enthusiasm, make your art and make money. Each episode is a mini-lesson in exploring what you want out of your OWN business, so that you can craft a life and business that fills your life with enthusiasm."
Hashtag Authentic - for Instagram, Blogging and Beyond
by Sara Tasker
The blurb: "Want to find an audience online for your creative work? Hashtag Authentic is a weekly podcast exploring the secrets to online success for dreamers, makers and creatives. With practical tips and inspiring stories, Sara Tasker of 'Me & Orla' guides you through the lessons and strategies she used to grow her 250k+ audience and six-figure business online. Tune in every Wednesday for analysis and interviews with trailblazing creatives, for an insider's view of all things Instagram, blogging, social media and beyond. Hashtag Authentic will equip you for the online world, dose you up on inspiration & information, and help you find your online tribe."
Make it Happen: a podcast for big hearted creative business owners
by Jen Carrington
The blurb: "Make It Happen is a podcast for big-hearted creatives who are ready to build an impactful, fulfilling, and sustainable creative life. Brought to you by Jen Carrington, a creative coach, this podcast is for you if you're ready to make things happen in your creative work and life on your own terms, in your own way, and by your own rules every step of the way."
My Open Kitchen
by Sophie Hansen and Skye Manson
The blurb: "My Open Kitchen is a podcast celebrating great stories from behind the farm gate, inspiring people, seasonal produce and the power of social media to help us all connect, collaborate and build communities."
Soulful PR Podcast
by Janet Murray
The blurb: "Learn how to get PR for your business that will help you grow your email list, social media followers and your client list. If you’re an entrepreneur wanting to get coverage in newspapers, magazines, and on radio & TV, tune in every Friday for insider tips and easy-to-implement strategies from award-winning Guardian journalist Janet Murray. You’ll hear inspiring interviews with entrepreneurs who are using traditional PR alongside blogging, webinars, email marketing and social media platforms like Facebook, Twitter, Pinterest, Instagram and Youtube to attract leads and grow their business."
The Membership Guys Podcast
by Mike Morrison
The blurb: "Weekly episodes containing proven, practical advice, strategy and tips for planning, creating and growing a successful membership website."
Pursuit With Purpose
by Melissa Griffin
The blurb: "I know first hand that it's way too easy to slip into the rat race of competition and comparison. In 2016 I hit my first million-dollar year in my business... yet, I was totally miserable. At the time, I was focused on numbers and status, rather than what would actually bring me real happiness and create an impact on the world. That all changed. This podcast is about my journey to meaning and fulfilment and how you can bring it to your own life - today and every day."
Dreams come true
 This is one of the most exciting announcements I've been able to make in a very long time.
Earlier this year, I received an email from the owner of my favourite paper company, Boots Paper (I wrote about them here), inviting me to design my own stationery! I sat there at my computer, reading that little message from one of the most beautiful, high-quality, ethically-produced stationery companies going around, inviting me to put my own stamp on their products, and had to pinch myself.
I decided to play it cool and act like this was the kind of invitation I received every day, as opposed to what it actually was: a dream come true. Moments later I utterly lost my cool and immediately hit reply with a resounding YES. I think I might even have written "This is a dream come true."
The original brief was to create two different notebook designs, the type that I would love to use myself if I was to sit and write a lively, personal letter (or write a lively, personal shopping list, for that matter). I got straight to work, and sent in those paintings, and then we started on some more. Swing tags, stickers, greeting cards, postcards, envelopes and more; featuring animals, botanicals, people, retro hobbies, food and hygge. And so much more.
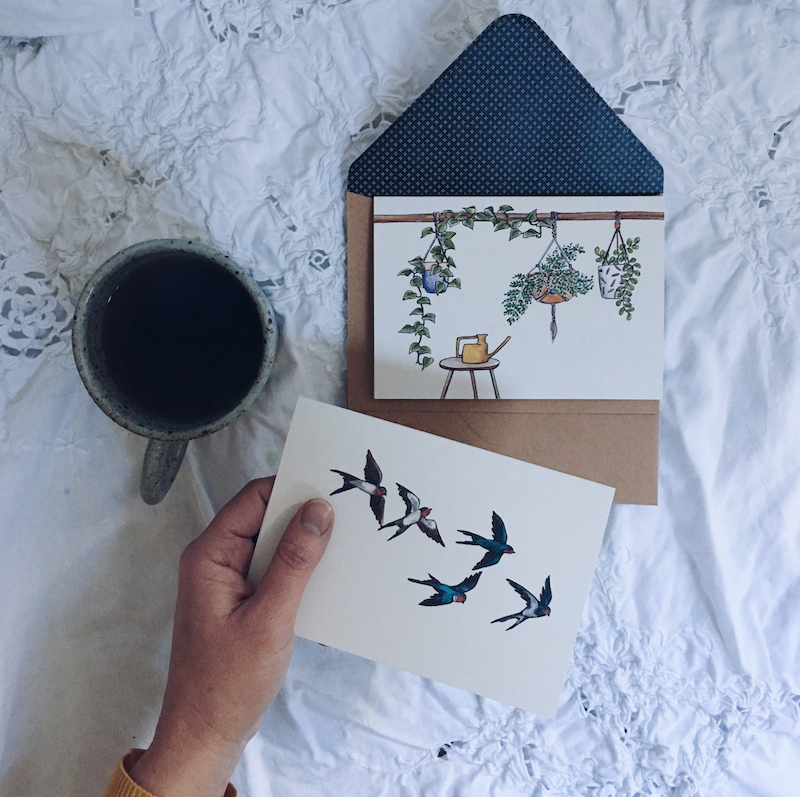
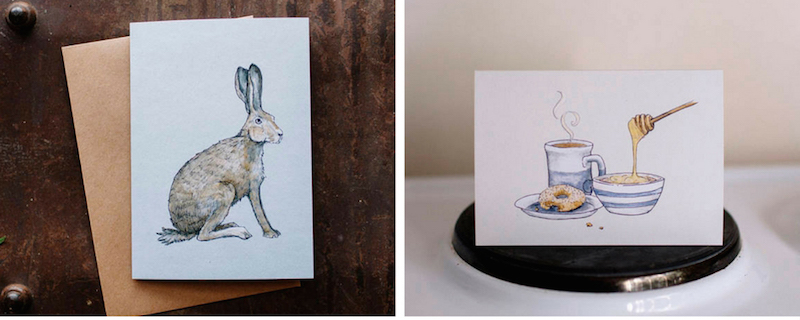
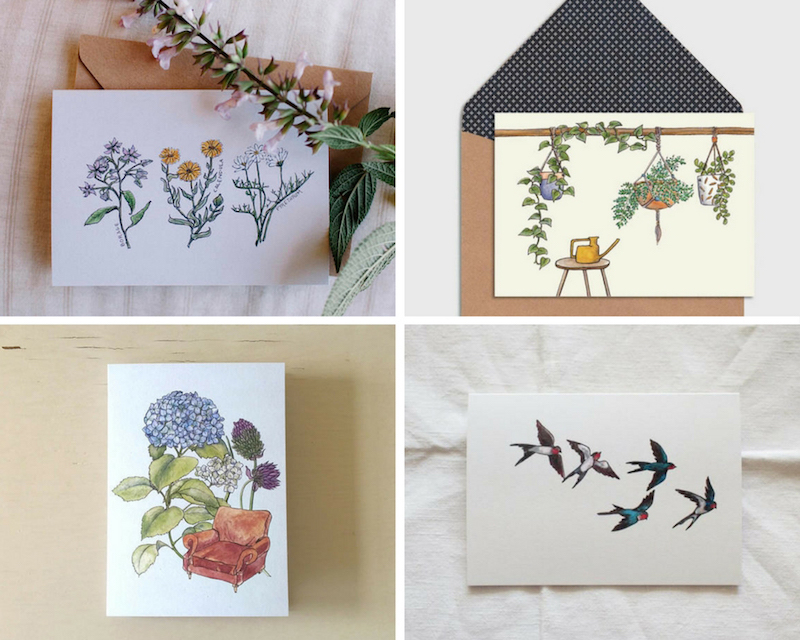
And today I am proud (SO PROUD) to announce that the very first of my designs are now available for sale on the Boots Paper online shop, as well as in Boots stockists all over the country.
They are the greeting cards you see in this blog post: hand-drawn and then painted by me in watercolour, gouache and ink; printed on 100 percent recycled paper; with matching envelopes that have been printed on the inside; all hand-assembled in Gippsland, Victoria.
Eeep!
There's more to come, so please excuse me while I go and paint some more. xo
ps. If you like these or any of the other Boots Paper designs, they ship anywhere in the world, and everything is hand-packaged beautifully. Just take a look at this package sent to me on a recent order! Leave a little note for the lovely owner, Brenner, to tell her I said hi.
Celebrating the makers
 Above: a collection of envelopes using my designs by @sculptedfilms on Instagram
Can we all please just take a moment to appreciate all the lovely work that people all over the world are putting into these print-and-paint snail-mail templates?
I have put off writing this blog post because I didn't know quite how to express how happy it makes me, sending my mail designs into the world, and then seeing how people are using them and making them their own, in order to send creative mail to others. It still sounds trite when I put it like that, but it truly warms my heart to see people actually using and enjoying what I make... and knowing that they in turn are bringing joy to others through the post.
Above: transparent envelope by Snailmailcool on Facebook

Above (clockwise from top-left): coloured envelopes by @murderingtime on Instagram, @lyndsey.thiessen on Instagram, @seniahhandmade on Instagram, @allyt_hobart on Instagram
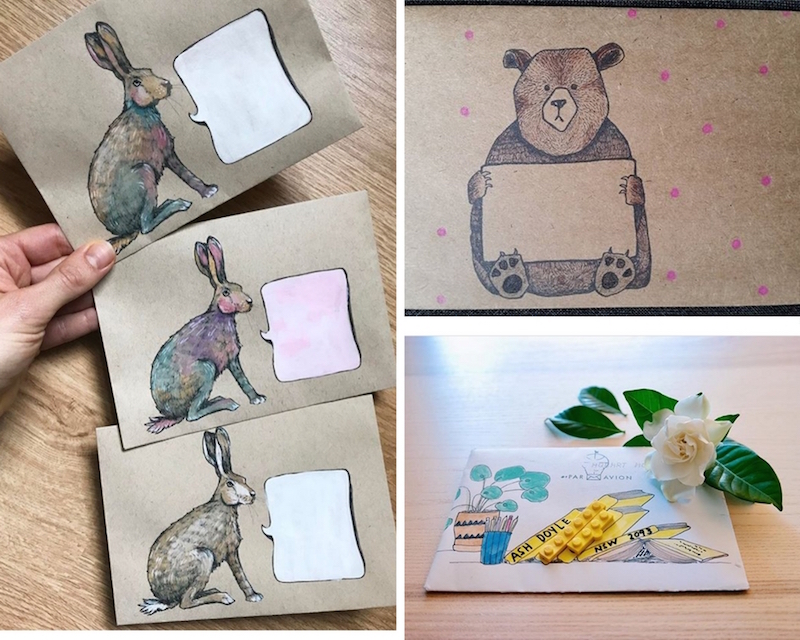
Above left, rainbow hare envelopes by @lyndsey.thiessen on Instagram, top right by @elisef03 on Instagram, bottom right by @allyt_hobart on Instagram
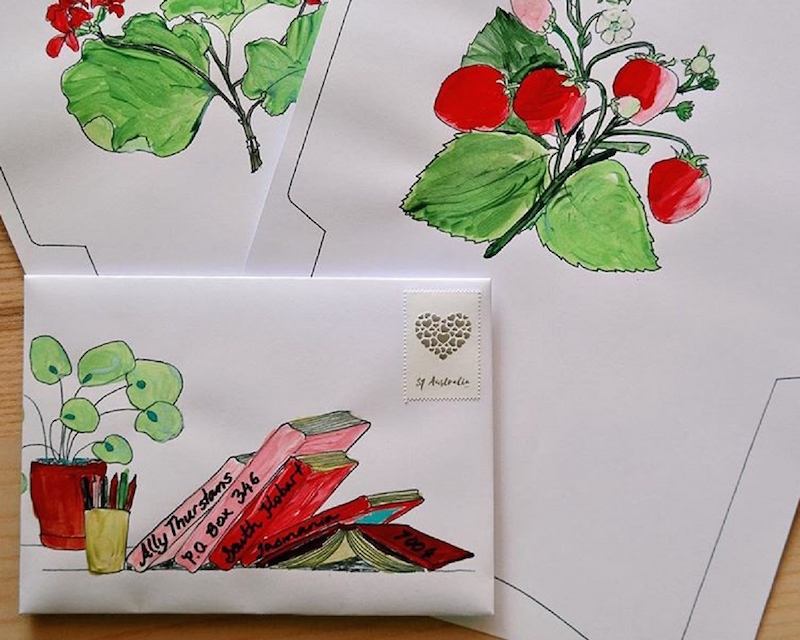
Above: strawberry, flower and book envelopes by @murderingtime on Instagram
If you don't know what this is all about, I create envelope templates with mail-art designs on them, that people can print off and turn into decorative envelopes to send through the post. They are free, and I send new designs out every month via my newsletter, Snail Mail Toolkit. You can sign up to receive them (as well as a free copy of my e-book, Making Mail: 10 steps to writing letters that become keepsakes, here.
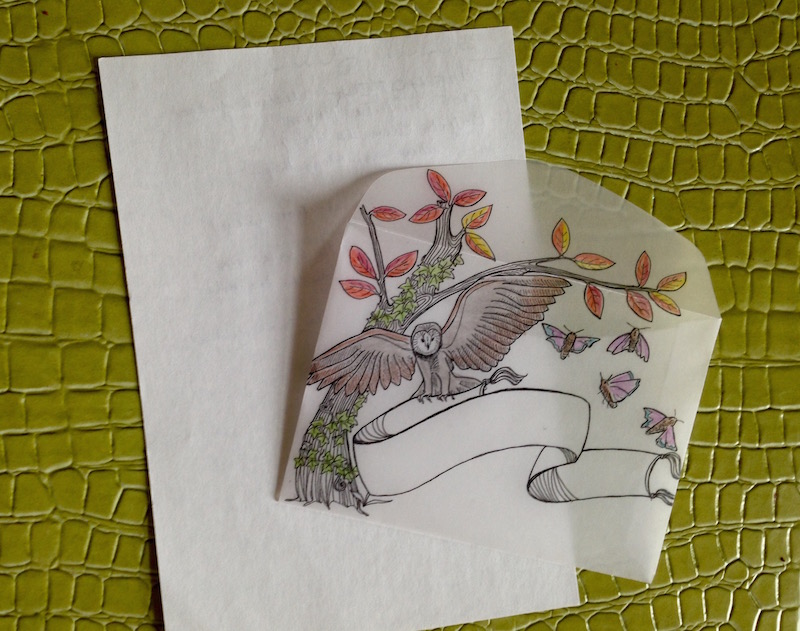
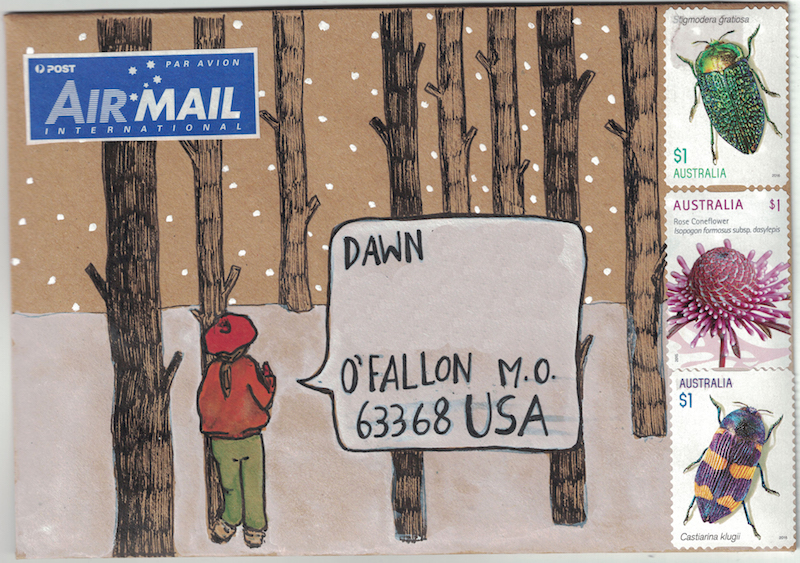
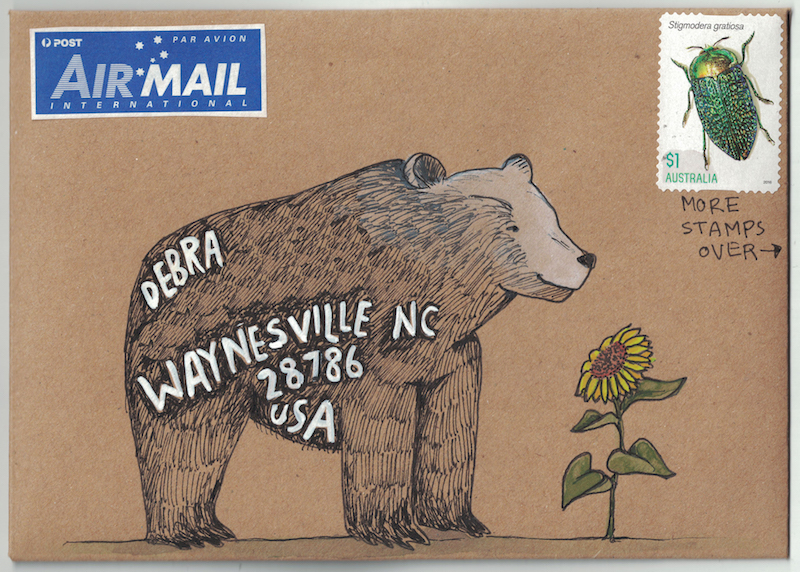
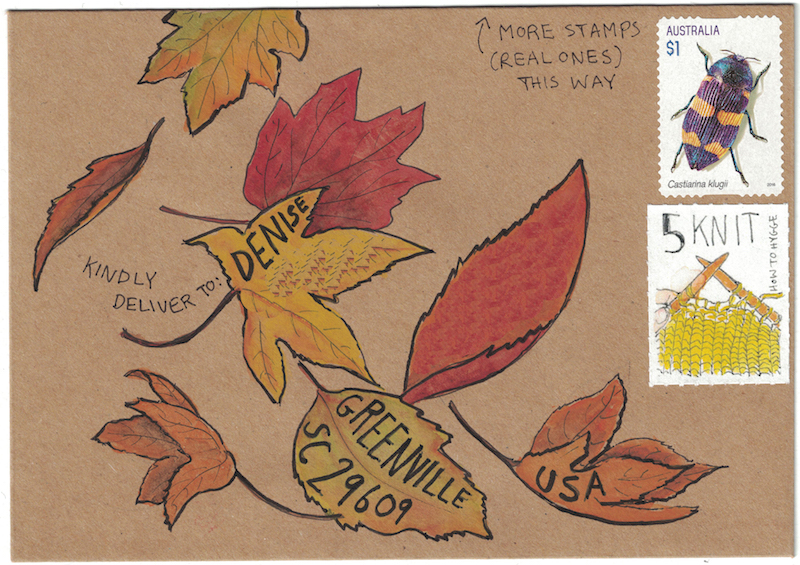
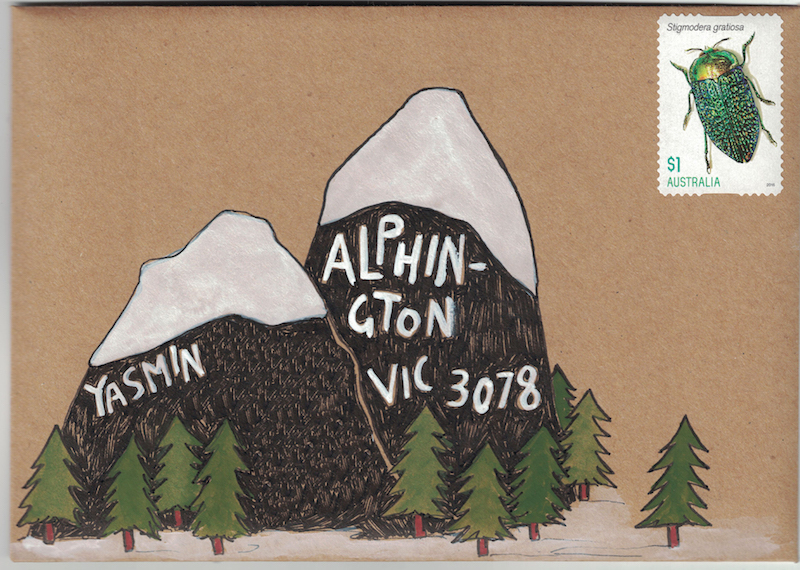
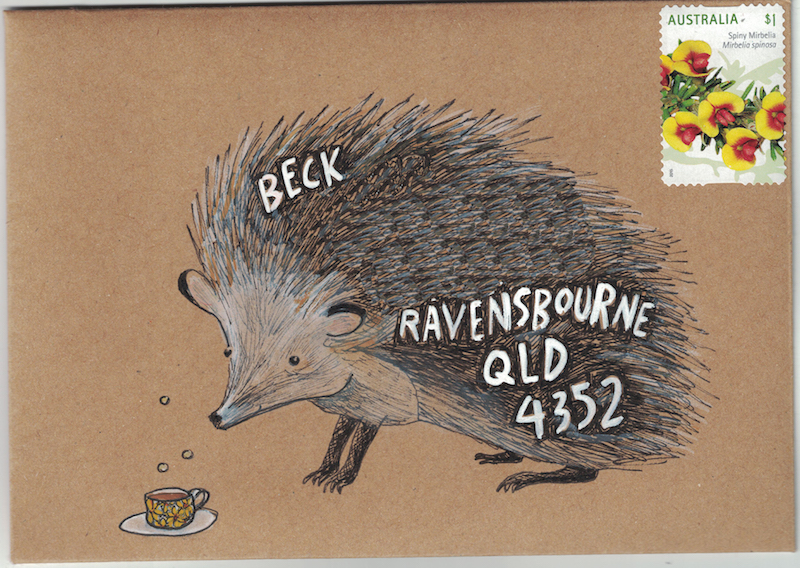
Mail-art: into the forest
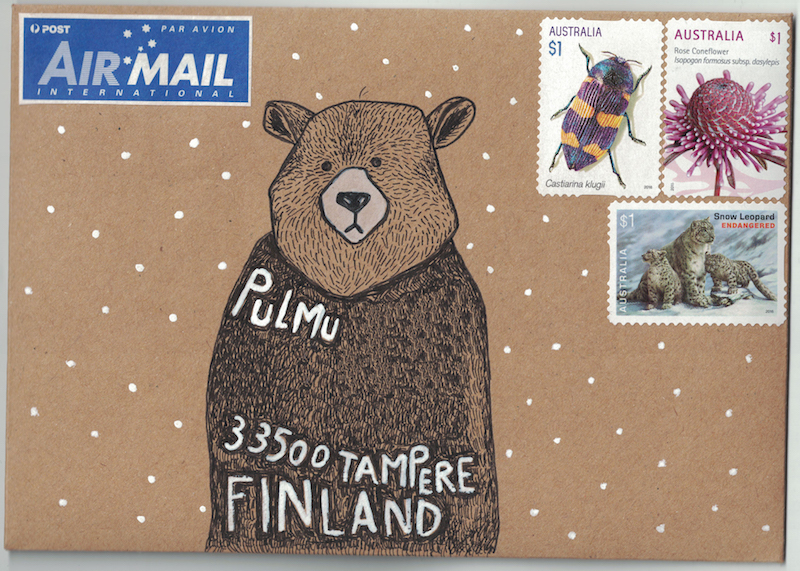 Recently I was commissioned to do a series of paintings of woodland animals, plants, trees and forest scenes. Inspired, I decided to play with the same theme in my mail-art, too.
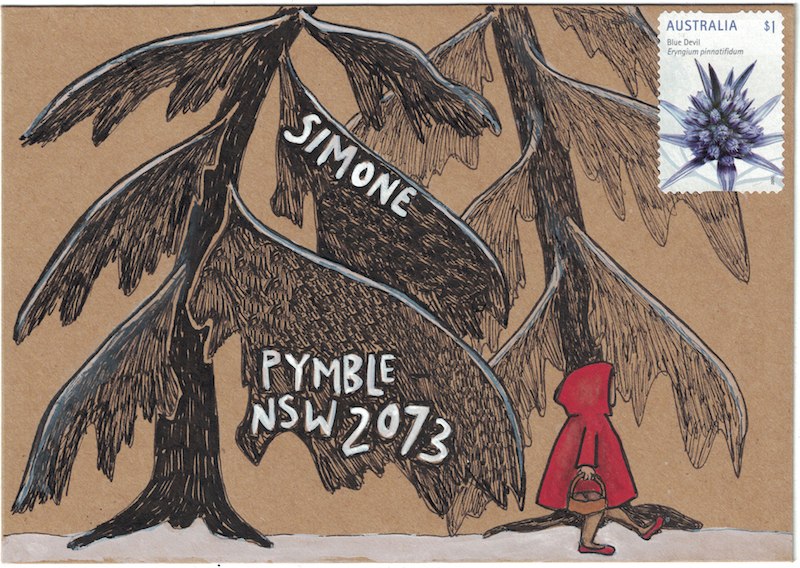
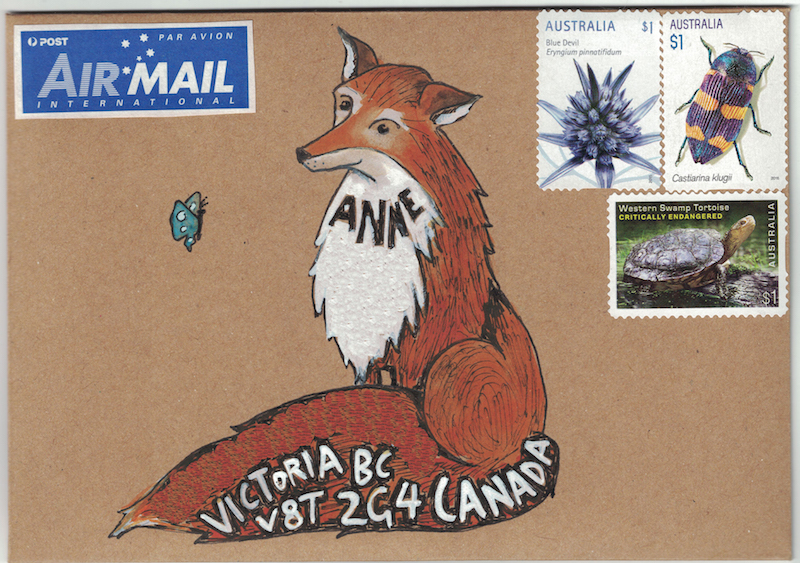
Sneak peek inside the April Snail Mail Toolkit
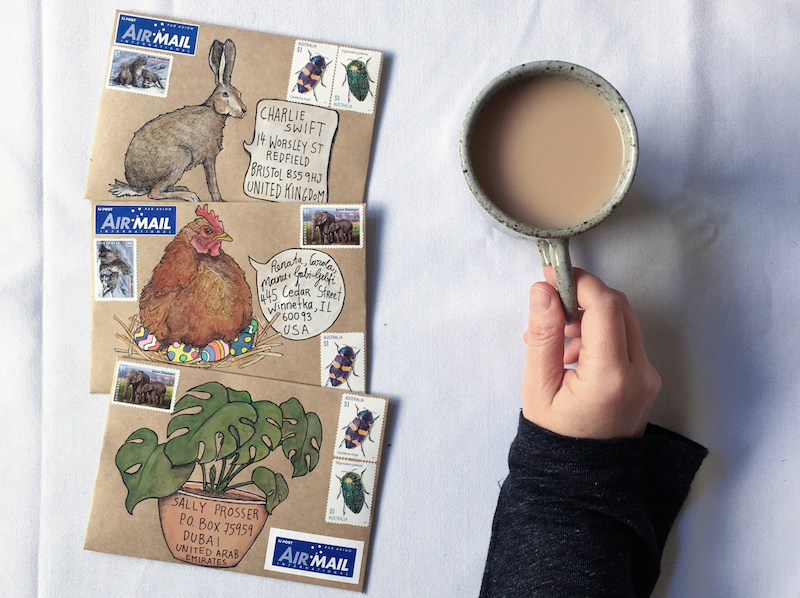 This is a sneak peek at the mail-art templates I'll be sending out in my Snail Mail Toolkit newsletter on Saturday morning. Would you like to make this mail? It's a gift from me to you!
I'm on a mission to bring back old-fashioned hand-written correspondence. Why? Answer these questions in your head:
- When was the last time you received an email? How did it make you feel?
- When was the last time you received a hand-written letter in the mail? How did that make you feel?
The practice of writing a letter is nostalgia, crafts, slow-living and community all rolled into one. And that's just for the sender. Imagine how it makes the recipient feel!
I launched my newsletter at the start of this year because I wanted to make it as easy and inspiring as possible for you to send somebody a letter... and to make it special with mail-art.
Every month there are templates with designs like the three above. All you have to do is print them out, follow the fold-lines to create the envelope, and add in the address. If you want to get more creative and have the time, you can do more, painting the designs as I have done, or colouring them, collaging over them, creating a washi-tape border around them, or any other crafty idea you have.
I also include ideas for what to write, or who to write to, or what else to include in your mail. And to help you get started, I send a copy of my e-book, "Making Mail: 10 steps to writing letters that become keepsakes," to newsletter subscribers, with some more detailed guidance to making mail.
If you like the look of the envelopes above, I'd love to see you make them too! I send new designs every month and once you download the templates, you can print them off as many times as you like (I used a slightly heavier recycled paper here, but normal copy-paper works fine). It's like having a never-ending stationery supply at your fingertips!
This blog post sounds like an ad doesn't it, but I promise it's all free (no strings!), so how I'd really like it to read is as an opportunity. Or an invitation. I just really want to see you feeling encouraged, inspired and empowered to write a letter to someone and to have a bit of creative fun with it.
You can subscribe to the Snail Mail Toolkit right here. Be sure to subscribe before 9am Saturday Melbourne time (heads up northern hemisphere readers that's your Friday) for these designs.
Finally (oh hi! thanks for still reading!) if you could help me spread the word about the Snail Mail Toolkit newsletter by sharing this post on your social media, that would be SO WONDERFUL of you. Maybe together we can make snail-mail mainstream again. (I think they call that the #snailmailrevolution)
ps. If you're on Instagram, pop on over to visit me later this morning, because I will be launching a lovely little giveaway to win some beautiful Boots Paper stationery (remember the post I wrote about Boots Paper last year?). You can find me on Instagram here.